
Modifying/Moving Hatching
Available in: Free, Plus, Pro, Architectural
To select a Hatch you must click anywhere on any of the hatch lines in the pattern not on the polyline boundary, the boundary is only used to create the hatch area and is not linked to it. Consequently modifications to boundary polyline will not update the hatch pattern. Once selected the whole hatch pattern is highlighted and a red entity handle is displayed at the hatch origin.
Click on the handle and the hatch can be moved (without the boundary) to a new position and clicked into place using any of the snaps and input options.
You can also change the hatch colour by simply selecting the required colour from the Properties Explorer or the Ribbon.
The Hatch can be Deleted by pressing the delete key.
In addition to the above when a hatch is selected further editing options are available (below) when the middle mouse button (wheel) is pressed.
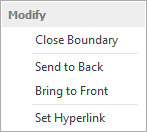
Send to Back/Front - Use these options to move the hatch backwards or forwards in the drawing order. This is useful when trying to position the hatch in front of or behind other entities.
Set Hyperlink - A Hyperlink can be added to the hatch. When selected use the dialog box that appears to set the required URL/link.
A hatch can also be Exploded into individual lines if required (only if the 'Curve Fit' property is set to 'False').