Multi Line
Available in: Pro, Architectural
Use this command to draw parallel lines.
A multi line is a set of parallel lines drawn with a single command in a similar way to the way a polyline is drawn. The difference is that it has a pre-defined multi line style which controls the number of the parallel lines, their spacing, colour and thickness. Click this button  to draw a 'multi line'.
Once selected the command prompt reads:
Give Start Point:
Select the first end point of the multi line using any of the snaps and input options and the command prompt reads:
Give Next Point:
It is important to note that the multi line style is set in the Properties Explorer, if it is switched off it can be switched on without aborting the command. A dynamic set of lines (depending on the multi line style selected) are drawn from the start point to the cursor. At this stage no line widths or colours are displayed on the dynamic segment. The Properties Explorer also has settings for the 'Justification' and 'Opposite Side' (See images below for options and information). Based on all of these settings the dynamic display shows the proposed multi line. You will also see a red line attached to the cursor, this is the justification line (it could lie directly on top of one of the lines in the style), this is covered later in the topic. Using any of the snaps and input options set the next point.
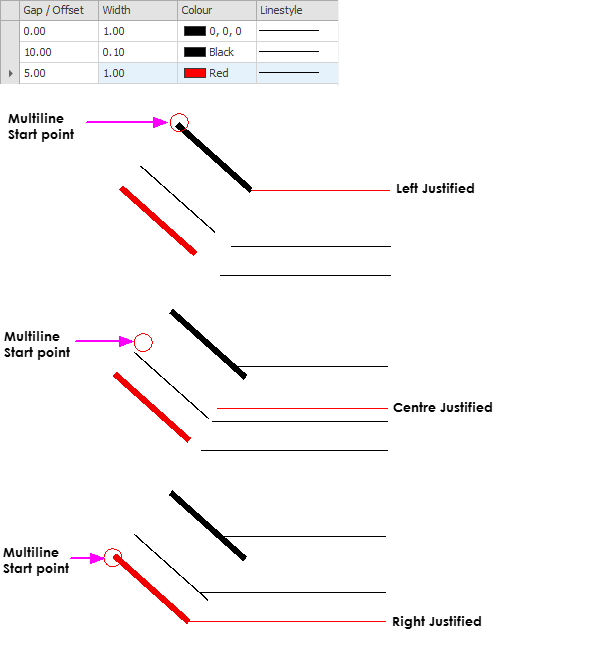
The 1st multi line segment is drawn and the dynamic set of lines is now drawn from this second point to the cursor. A small circle is displayed at the first point selected. This is drawn to assist identifying the beginning of the multi line.
The command prompt now reads:
Give Next Point or (A)rc or (T)hree Point Arc or (Escape) to End:
Further points can now be selected to continue to add line segments to the multi line but we also have the options to draw segments as Arcs using the two additional options. All of the command line options work identically to the polyline command.
If a third point is added a then (C)lose and (U)ndo options are added to the prompts. Right click the mouse to finish drawing the multi line.
Whilst drawing a multi line the Properties Explorer shows 'Justification' and 'Opposite Side' settings.
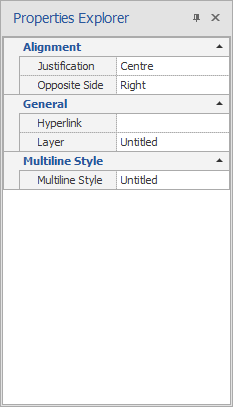
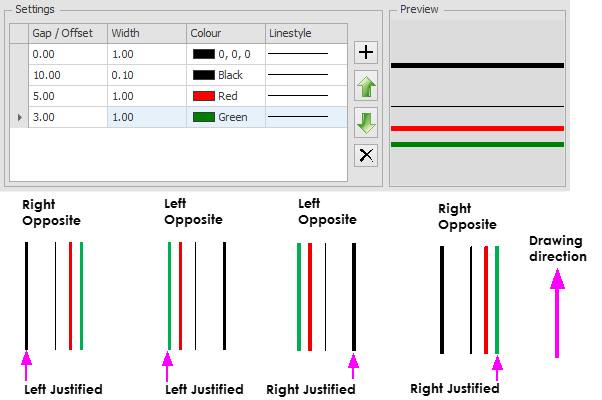
'Justification' can be set as either Left, Centre or Right. This is the position of the cursor in relation to the multi line (in the drawing direction). As mentioned previously a temporary red line is displayed, effectively this is the 'line' being drawn and the other lines within the multi line are offset from this line, depending on the current style settings this line could lie on top of an actual line within the style.
In the image below you can see the effect of changing the Justification on a multi line (drawn from left to right). The Style settings of the line are also shown.
'Opposite Side' effectively defines which side of the multi line the offsets are drawn toward. In the example below you can see a style definition and 4 multi lines drawn with it. So regardless of the justification setting you can see that it is possible to change the offset order from one side to the other using the 'Opposite Side' setting. To explain further if the first line in the style definition is the origin line then the last line in the sequence (green) is on the opposite side to it. You can see in the 4 examples that this line is on the right or left as per the setting in each case.