
Tutorial 1 Part 4
Available in: Free, Plus, Pro, Architectural
Next we will add the vertical centre line, however this is going to be used to help us construct the side view of the flange. So for now we won't worry about the colour or line style or it's finished length, you will see that these things can be modified later.
Select the Line button  and the prompt reads:
Give Start Point:
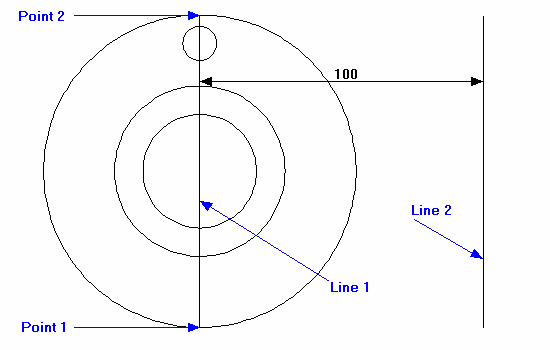
Select the quadrant point snap at the bottom of the outer circle (Point 1 in the diagram). A dynamic line will be drawn from this point to the cursor. The prompt now reads:
Give Next Point:
Position the cursor on the circumference of the largest circle near to Point 2 and hit  and click to accept the quadrant point selected. This is a Keyboard Snap and eliminates the need to hit F7.
We will now use this line to start the side view.
If you wish you can 'right-click' the mouse to finish drawing lines. Alternatively selecting the next command would do the same.
Select the Offset button  and the prompt reads:
Give Line/Arc/Circle to Offset:
Select the 'Line 1' shown in the diagram and the prompt now reads:
Give Point to Offset To:
As you move the cursor a dynamic offset moves parallel to the 'Line 1'. The Input Option has been set to Distance and you will see a dynamic dimension between 'Line 1' and the dynamic offset. Either 1) Type '100' and hit  Click to place the new offset line when the dynamic dimension reads 100.00.