
Control Point
Available in: Pro, Architectural
Click the 'Control Point' button  to add a 'Control Point' to a Symbol. Control Points are used to manipulate a symbol once it has been inserted into another drawing. There are five types of 'Control Point' which allow the scale and orientation of the inserted symbol to be modified.
Each 'Control Point' is defined by two points and the 'Control Point Type'.
After selecting the button the command prompt reads:
Give Origin Point:
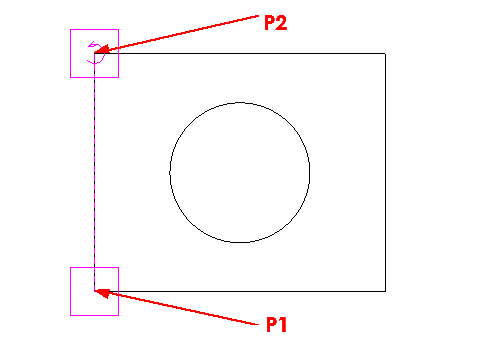
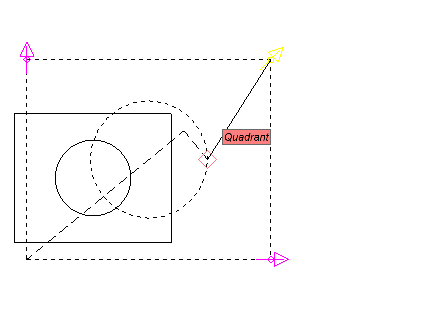
Snap to a point on the symbol which is the origin point for the action. i.e. this is the point from which the scale or rotation change will be anchored. The example image below left shows the bottom left corner point of the symbol (P1) will be the anchor.
After selecting this point the prompt now reads:
Draw Control Point:
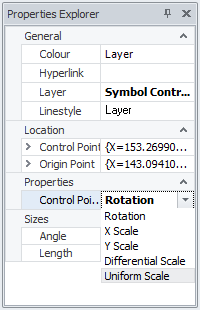
'The Control Point' is the point that is selected to modify the symbol after it is inserted. Here we have selected the top left corner (P2). The control point symbol is added showing the origin (an empty rectangle) at P1 and Rotation icon at P2. 'Rotation' is default type which can be changed in the Properties Explorer (below right) at any point during the creation of the point or afterwards by selecting it.
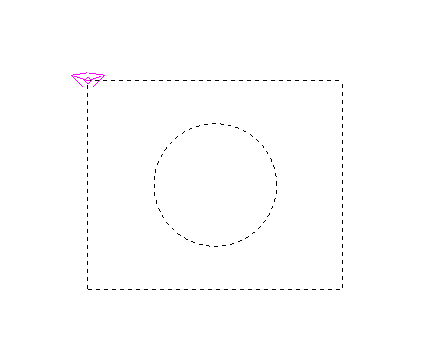
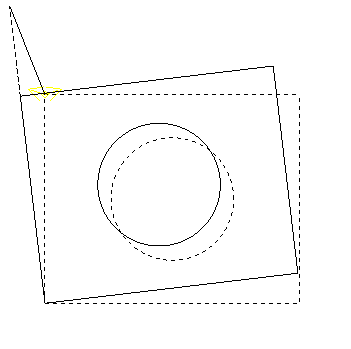
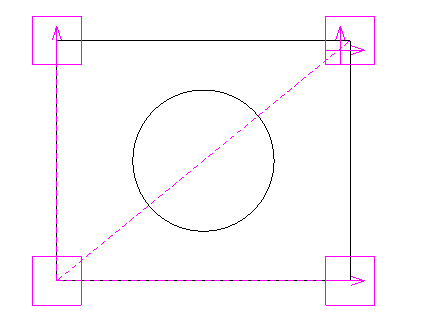
So when the symbol is inserted into a drawing it can be selected by clicking anywhere on it and the 'Control Point(s)' are displayed as shown below left. The symbol on the top left corner indicates that it is a 'Rotation Control Point', simply click on the point then move the cursor to the required position (below right). Click to accept the new rotation position.
The other 4 types of 'Control Point' all provide scaling options. In the example below the 'Rotation Control Point' has been removed for clarity and 3 new 'Control Points' have been added exactly as the 'Rotation Control Point' was added by selecting an origin point and the control point itself. The 'Control Points' here have been labelled showing that the 'Control Point' type can be easily identified.
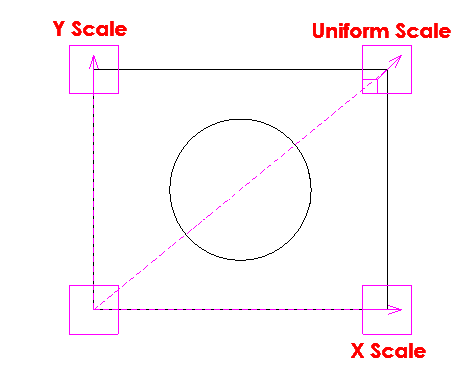
When inserted into another drawing the 'Control Point Types' above work as follows when selected.
X Scale - Allows scaling in the X axis (horizontal only). Important this always scales in X in line with the symbol origin. So when placing a new control point of this type the 1st of the 2 points is largely irrelevant, the second point should always be in line (vertically) with the symbol origin.
Y Scale - Allows scaling in the Y axis (vertical only). Important this always scales in Y in line with the symbol origin. So when placing a new control point of this type the 1st of the 2 points is largely irrelevant, the second point should always be in line (horizontally) with the symbol origin.
Uniform Scale - X & Y axis scaling is proportional in both axis.
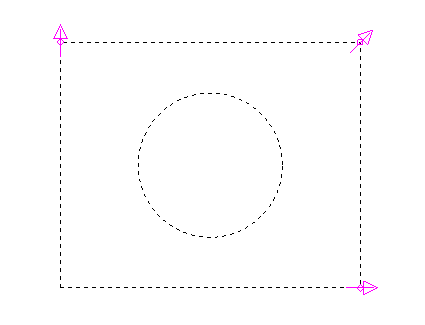
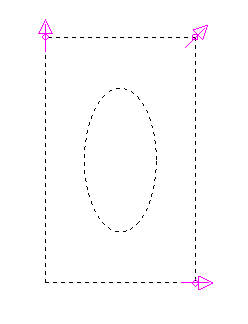
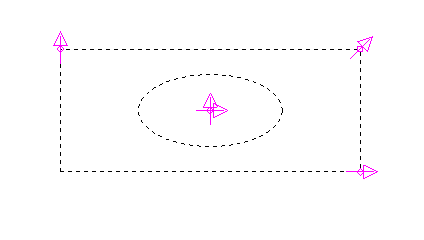
To further explain these scaling types think of it as re-sizing the 'Control Point' line itself. So for example the images below show the results of modifications to the 3 'Control Points'. If the 'X Scale Control Point' was moved and snapped to P1 (below left).
The final type of 'Control Point' is 'Differential Scale'. This allows scaling in the X axis and the Y Axis independently. If we change the top right hand 'Control Point' in the symbol to be the this type you can see the different result if this point was moved to P3 when inserted.
The displayed size of the 'Control Point' is controlled by the current 'Point size' in the system Points settings.