
Modifying/Moving an Image
Available in: Pro, Architectural
To select an image click anywhere on its edge/boundary. Four entity handles are displayed, one at each corner with the main red handle placed at the first of the two points used to define its containing box when inserting the image.
To move the image click on the red handle and it can be moved to a new position using any of the snaps and input options.
Selecting any of the three blue handles allows the image to be re-sized by selecting a new position for that corner using any of the snaps and input options. (Note the proportional scale is always maintained.)
In addition to the above when a hatch is selected further editing options are available (below) when the middle mouse button (wheel) is pressed.
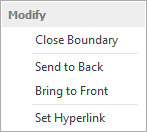
Send to Back/Front - Use these options to move the hatch backwards or forwards in the drawing order. This is useful when trying to position the hatch in front of or behind other entities.
Set Hyperlink - A Hyperlink can be added to the hatch. When selected use the dialog box that appears to set the required URL/link.