Tutorial 1 Part 10
Available in: Free, Plus, Pro, Architectural
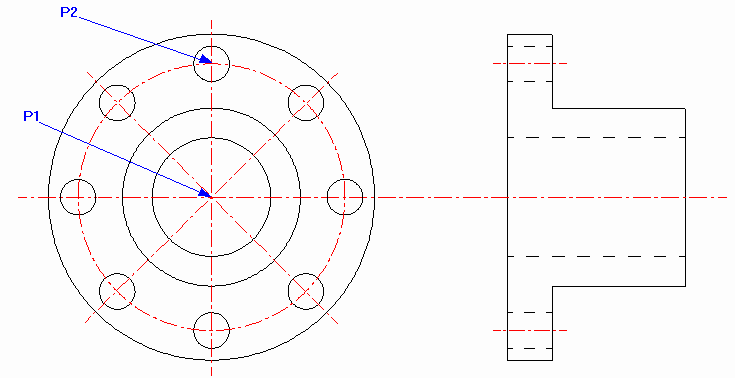
We just need a few more centre lines to add before moving on to the dimensions. Click on the vertical centre line so that its Entity Handles are displayed. Select the Rotate button  and the prompt reads.
Give Point To Rotate About:
Select the 'Cen' point (P1) and the prompt reads:
Give Reference Point To Rotate To:
Select the 'Cen' point (P2) and the prompt reads:
Give Point To Rotate To:
Now the polar input mode is automatically selected. Hold down the  key (this creates a copy) and move the cursor to the LEFT and around until the angle dimension reads '45.0' and click. The new rotated line is now in place. The original line is still selected so right-click to repeat the command. This time select the same points but move the cursor to the RIGHT and around until the angle dimension reads '315.0' and click (remember to hold
  to copy).
Select the Circle button  and create a circle using P1 as the centre and P2 as the radius point. (If X, Y or Polar is set when positioning the radius point just hit
 .)
.)