Tutorial 3 Part 4
Available in: Free, Plus, Pro, Architectural
Now we will create a series of offset lines to build up the detail of the calculator. Select the Offset button  .
.
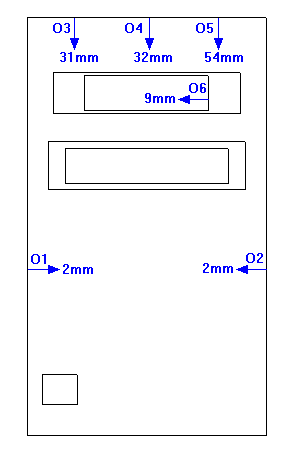
The first diagram below shows the lines to select (O1 to O6) and the offset distance and direction. For example select the left vertical line near to the arrow shown, drag the cursor to the right as shown by the arrow and type '2' as the offset Distance and press  . Repeat this procedure for the other lines shown, each time the last offset value used will be 'locked' when you move the cursor, simply type in the new value required. Repeat the offset of 'O6' twice more each time 9mm to the left of the new line. Your drawing should be as shown in the second diagram.
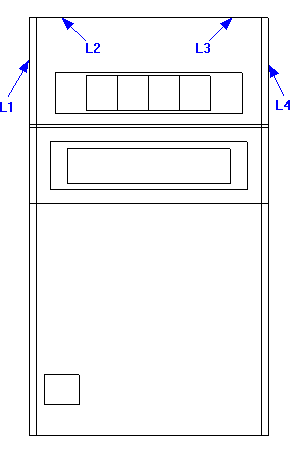
Now we will create the chamfer's on the top two corners. Select the Chamfer command  . click on line 'L1' then on 'L2'. Draft it now requires two chamfer sizes to be set, one along each of the lines selected. Now use the Direct Input feature to enter the chamfer sizes. Type 5 and press
  , now type 5 again and press .
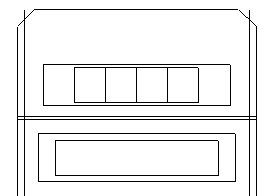
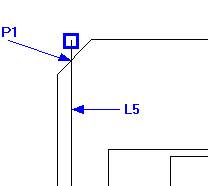
The top part of the calculator should now look as shown below left. We will now use Entity Handles to adjust the two lines protruding through the chamfers. Click on 'L5' and the entity handles are displayed. Click on the top blue handle (make sure Snap  is set (
 )) and move to the 'Intersection' shown (P1) and click to accept. Repeat this operation on the other corner.