
Tutorial 3 Part 2
Available in: Free, Plus, Pro, Architectural
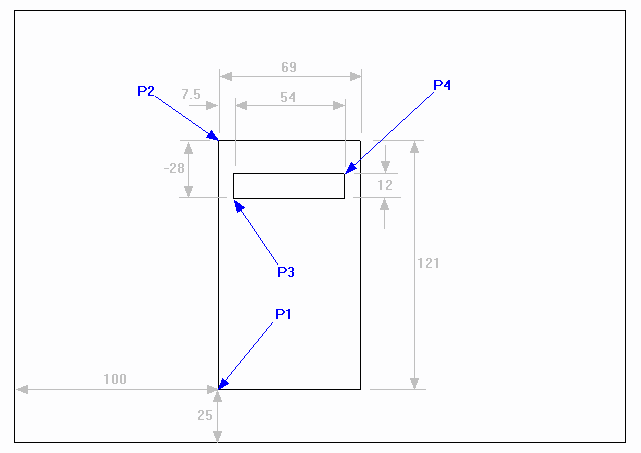
First we will draw the main outline.
Select the Rectangle button  The prompt reads:
Give Start Point:
The first corner (P1) is 100mm across in 'X' and 25mm up in the 'Y' axis from the Origin Point, to do this we can use Relative feature. Move the cursor over the Origin Point and hit the key. Now using the Direct Input feature you can type in the co-ordinates of the start point of the rectangle. Simply type '100' and press
  (this is the X value), now type ,'25' and (this is the Y value). The first corner is located so now the opposite corner can specified using the same method. The prompt reads:
Give Opposite Corner Point:
Now type '69' and press (this is the X value), now type ,'121' and (this is the Y value). The rectangle is drawn.
Click on Zoom Extents  to get a closer view and reselect the Rectangle command. Our next point (P3) is 7.5 in 'X' and -28 in 'Y' from P2. We can go Relative to P2 by moving the cursor over P2 and hit the
 key. Now type '7.5' and press (this is the X value), now type ,'-28' and (this is the Y value)'. For the other corner Type '54' and press , then type ,'12' and . The second rectangle is drawn