
Draft it Help System
The complete Help system for Draft it is available on these pages.
Available in: FREE, Plus, Pro, Architectural
When a dimension is selected its entity handles are displayed. Draft it dimensions once placed on the drawing are independent of any geometry used in their creation (i.e. the circle selected when creating a diameter dimension). Once you have selected the dimension(s) the editing choices are to either Delete it, Move the entire dimension(s), move one of the entity handles or to modify the properties using the Properties Explorer or the Ribbon. There are three types of dimension which are edited as follows:-
Linear
A linear dimension has three entity handles, one at the end of each leader line, the other at the location point of the dimension line, all of these are blue. Move the cursor over any of the handles and its colour changes to yellow then simply click to select it. If selected the dimension location handle attaches the dimension line and text to the cursor allowing a new position to be selected using any of the snaps and input options. If this is positioned between the two dimension points then the dimension text is placed centrally, if outside then the text is placed to the side selected. The leader lines are then altered to suit. If one of the leader line handles is selected it is attached to the cursor and can be moved to a new position and clicked into place using any of the snaps and input options. As the handle is moved the dimension value is recalculated to show the modified size.
Diameter
A diameter dimension has three entity handles, one at the centre of the arc/circle (red), one at a point defining the start of the arc/circle selected (blue) and the other at the dimension point (blue). Move the cursor over any of the handles and its colour changes to yellow then simply click to select it. A point to note here is that these handles are defined when the dimension is added to the drawing as the arc/circle is selected, after this they do not retain a relationship with the arc/circle so when any are moved the arc/circle remains untouched. However it is possible to edit both the geometry and the dimension, see Modifying/Moving Multiple Entities.
Select the centre handle (red) and the entire dimension is attached to the cursor allowing a new position to be selected using any of the
snaps and input options. (Alternatively select the
 Move command).
If the handle at the dimension point is selected it is attached to the cursor and can be moved to a new position around the arc/circle and clicked into place
using any of the snaps and input options. If the handle at the start
of the arc/circle is selected it can be moved in and out from the arc/circle centre to a new position and clicked into place using any of the
snaps and input options. As the handle is moved the dimension value is
recalculated to show the modified size.
Move command).
If the handle at the dimension point is selected it is attached to the cursor and can be moved to a new position around the arc/circle and clicked into place
using any of the snaps and input options. If the handle at the start
of the arc/circle is selected it can be moved in and out from the arc/circle centre to a new position and clicked into place using any of the
snaps and input options. As the handle is moved the dimension value is
recalculated to show the modified size.
Radial
A radial dimension has four entity handles, one at the centre of the arc/circle (red), one at a point defining the start of the arc/circle selected (blue), another at a point defining the end of the arc/circle selected (blue) and finally one at the dimension point (blue). Move the cursor over any of the handles and its colour changes to yellow then simply click to select it. A point to note here is that these handles are defined when the dimension is added to the drawing and the arc/circle is selected, after this they do not retain a relationship with the arc/circle so when any are moved the arc/circle remains untouched. However it is possible to edit both the geometry and the dimension, see Modifying/Moving Multiple Entities.
Select the centre handle (red) and the entire dimension is attached to the cursor allowing a new position to be selected using any of the
snaps and input options (Alternatively select the
Move command).
If the handle at the dimension point is selected it is attached to the cursor and can be moved to a new position around the arc/circle and clicked into place
using any of the snaps and input options. If the handle at the start
of the arc/circle is selected it can be moved in and out from the arc/circle centre to a new position and clicked into place using any of the
snaps and input options . As the handle is moved the dimension value
is recalculated to show the modified size. If the handle at the end of the arc/circle is selected it can be moved to a new position and clicked into place
using any of the snaps and input options. As the handle is moved the a
leader arc is recalculated and drawn from the dimension point to the start point of the arc.
Angular
A 3 point angular dimension has four entity handles. One at the each of the three angle points including the corner point, the remaining handle is at the dimension location point, all of the handles are blue except the centre which is red . Move the cursor over any of the handles and its colour changes to yellow then simply click to select it. A point to note here is that these handles are not linked to any geometry, only to the points selected when creating it.
Select the centre handle (red) and the entire dimension is attached to the cursor allowing a new position to be selected using any of the
snaps and input options. (Alternatively select the
Move command.)
If the handle at the dimension point is selected the angular dimension arc and text are attached to the cursor and can be moved to a new position using
any of the snaps and input options. If either of the handles controlling
the angle are selected they can be moved to a new position and clicked into place using any of the
snaps and input options recalculating the dimension value to show
the modified angle.
Arrows
Leader Arrows and Double Ended Arrows are modified/moved in exactly the same way as Modifying/Moving a Line.
Datum
FREE, Plus, Pro, ArchitecturalThe Datum symbol has one entity handle (red) placed at its centre. Click on the symbol then move the cursor over the handle and its colour changes to yellow then simply click to select it. Now it can be moved to a new position using any of the snaps and input options.
A Datum Dimension has two entity handles (both blue). One at the dimensioned point, the other at the dimension location point. Move the cursor over either handle and its colour changes to yellow then simply click to select it. A point to note here is that these handles not linked to any geometry, only to the points selected when creating it.
If the handle at the dimensioned point is selected the dimension and text are attached to the cursor and can be moved to a new position using any of the snaps and input options, as the cursor is moved the dimension is automatically recalculated. If the handle at the dimension location point is selected the dimension text can be moved to a new position and clicked into place using any of the snaps and input options, the dimension leader length is automatically updated.
Style Settings
Every dimension is stored with a Dimension Style. This controls the appearance of a dimension. You can change the settings of an individual dimension using the Properties Explorer. This does not change the Dimension Style only the parameters you change. This allows you to have Dimension Style(s) for the overall appearance of the dimensions but you can still make changes to specific dimensions where required rather than creating a new style. The Reset Style Overrides button on the Annotation Group ribbon lets you reset these changes if required.
In addition to the above when a Dimension is selected further editing options are available (below) when the middle mouse button (wheel) is pressed.
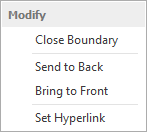
Send to Back/Front - Use these options to move the Dimension backwards or forwards in the drawing order. This is useful when trying to position the Dimension in front of or behind other entities.
Set Hyperlink - A Hyperlink can be added to the Dimension. When selected use the dialog box that appears to set the required URL/link.