Draft it Help System
The complete Help system for Draft it is available on these pages.
Available in: Plus, Pro, Architectural
polylines are a series of single lines and/or arcs (segments) stored together as a single entity and are created using the polyline command.
When a polyline is selected the entity handles for all of its segments are displayed. The editing choices are to either Delete, modify the properties using the Properties Explorer or the Ribbon, or to move one of the entity handles.
A line segment has three entity handles, one at each end (blue) and one at its midpoint (red). Each arc segment also has three entity handles,
one at each end (blue) and one at its midpoint which is also blue. Move the cursor over any of the handles and its colour changes to yellow then
simply click to select it. If selected the major handle (red) attaches the whole polyline to the cursor allowing it to be moved to a new position and
clicked into place using any of the snaps and input options.
(Alternatively select the
 Move
command.) If any of the minor handles are selected then they can be dragged to new positions and clicked into place using any
of the snaps and input options. The attached
segment(s) are updated accordingly. It is worth noting here that any tangency between segments created when the polyline was drawn will be lost.
Move
command.) If any of the minor handles are selected then they can be dragged to new positions and clicked into place using any
of the snaps and input options. The attached
segment(s) are updated accordingly. It is worth noting here that any tangency between segments created when the polyline was drawn will be lost.
A polyline also has a 'Curve Fit' property, this can be set as either 'True' or 'False'. The Properties Explorer can be used to change this setting for any polyline regardless of whether it was created with the polyline or Curve Fit commands.
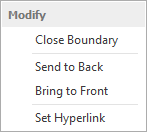
In addition to the above when a polyline is selected further editing options are available (below) when the middle mouse button (wheel) is pressed.
If the polyline is closed i.e. with no gaps.
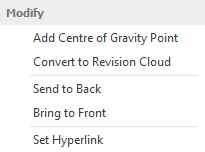
Add Centre of gravity Point - Select this option to add a Point at the centre of gravity position (Centroid) for the polyline. The point is drawn using the current System Point Settings. If these settings are changed at any later time the point display will update. The point created is independent of the Proline and is created to show the current position only. If the polyline is modified or moved then a new point would need to created in the same way to show the updated position. The point is the same as any other created with the Point command and can be moved or deleted as required.
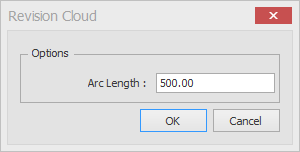
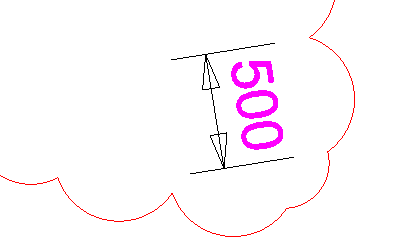
Convert to Revision Cloud - If selected the polyline is converted to a Revision Cloud. The following dialog box is displayed.
Send to Back/Front - Use these options to move the polyline backwards or forwards in the drawing order. This is useful when trying to position the polyline in front of or behind other entities.
Set Hyperlink - A Hyperlink can be added to the polyline. When selected use the dialog box that appears to set the required URL/link.
A polyline can also be Exploded into individual lines and arcs if required (only if the 'Curve Fit' property is set to 'False').
If the polyline is not closed then the first 2 options above are replaced by the 'Close Boundary' option. Selecting this will close the polyline with a single line segment between the first and last point.