Draft it Help System
The complete Help system for Draft it is available on these pages.
Available in: Architectural
Inserting Windows with Draft it Architectural is similar to Door insertion. First we are going to insert a standard window in Bedroom 2.
This will be positioned centrally on the front wall. Select the
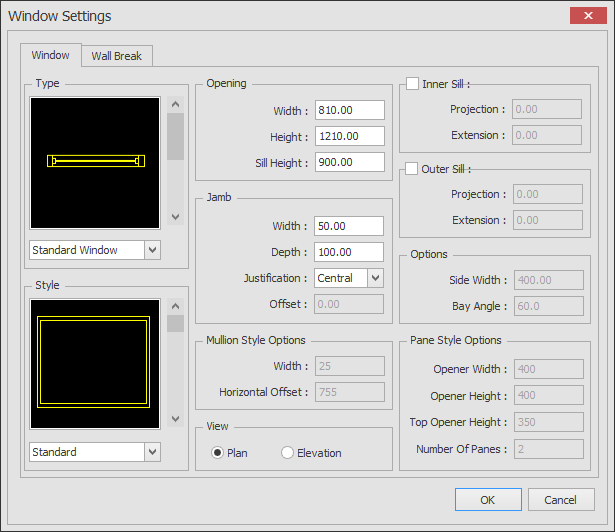
 Window button , this will open the dialog box shown below
(make sure you change the width to 1810).
Window button , this will open the dialog box shown below
(make sure you change the width to 1810).
Note: All of the windows we will insert match the settings above, the only variation is the width.
You will notice that the Ribbon has changed to display a Command Specific Ribbon
for inserting Windows. Check that the Justification
is set to 'Centre' and move the cursor over the lower right wall. As you come into contact with the wall the dynamic dimensions are displayed. Ignore these, hit
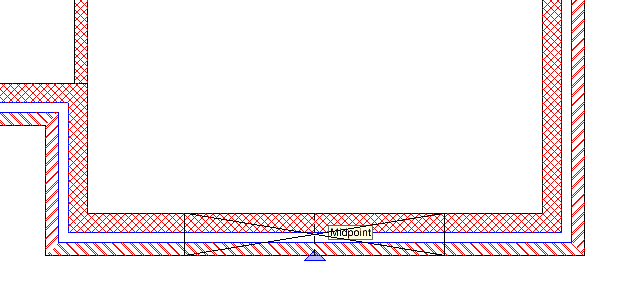
 and move the cursor along the front face to the middle of
the wall until the 'Mid' snap symbol is displayed (see below). Simply click to confirm this position.
and move the cursor along the front face to the middle of
the wall until the 'Mid' snap symbol is displayed (see below). Simply click to confirm this position.
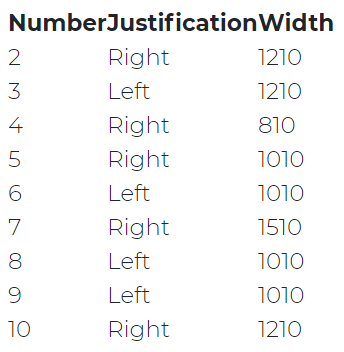
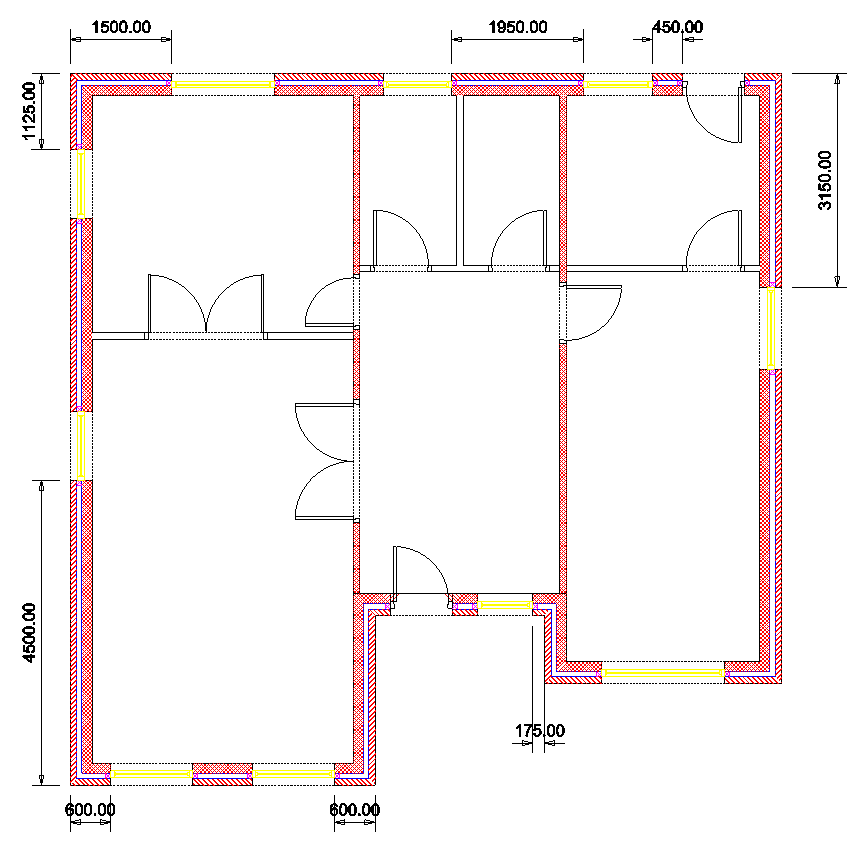
Once this has been done insert the remainder of the windows so that they appear as shown in the picture below, using the information in following table. The 'Justification' refers to the window justification set in the Ribbon not the 'Jamb' 'Justification' in the window dialog box.
The picture below shows the dimensions to place the windows, remember to use the controlling dimension feature as with the doors previously.