
Draft it Help System
The complete Help system for Draft it is available on these pages.
Available in: Architectural
The symbols added to the plan have been selected from the Draft it Architectural symbols libraries.
Only symbols from the following categories have been used on this floor


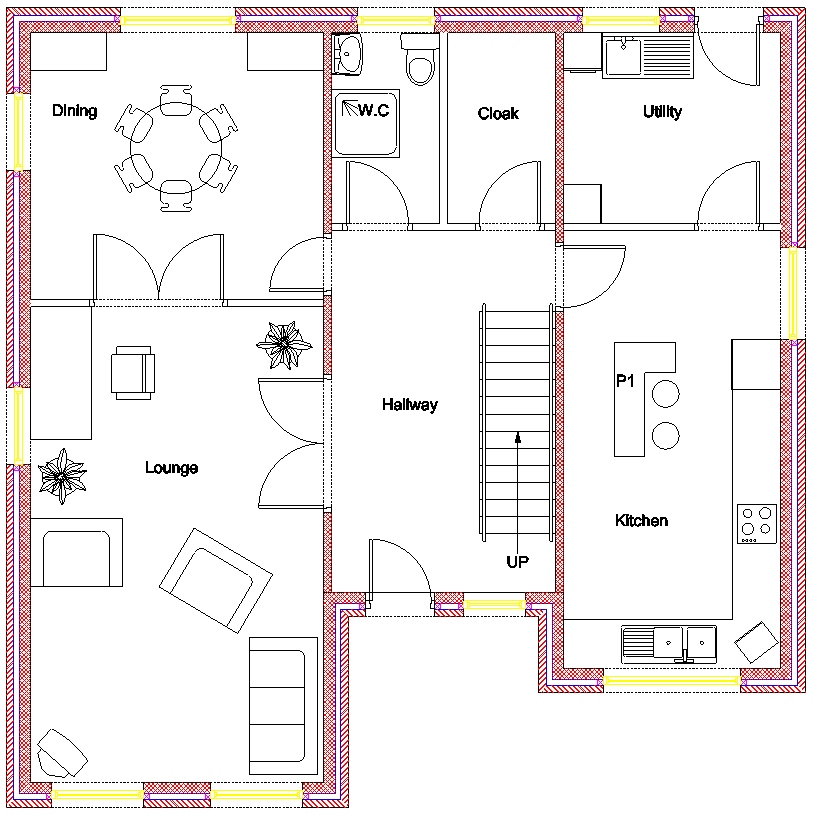
Room names have been added to the picture above to assist in placing the ground floor furniture.
Lets start with the lounge. Click on the 'Furniture'
button.
Scroll down to the bottom of the following dialog, click on the 'TV' symbol icon at the end of the 'Misc' group.
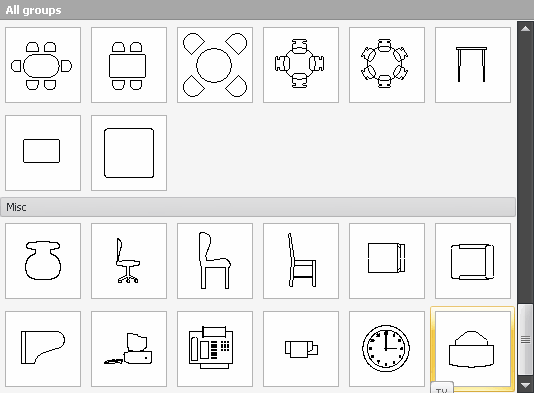
Click on 'Insert', the TV symbol is now attached to the cursor for placement. Move to the corner of the lounge and click into place, then move the cursor around to achieve the desired rotation.
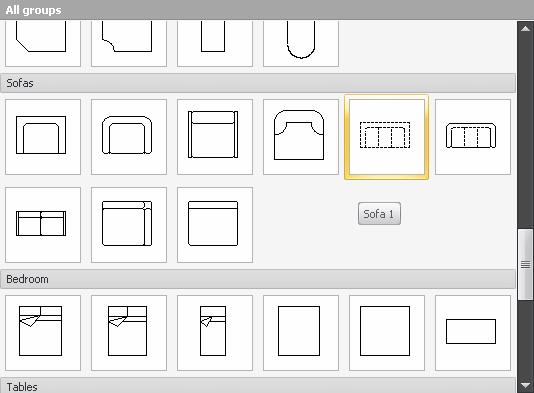
Now select the 'Furniture' button
again.
You will notice that the dialog is automatically scrolled to the position when the last symbol was selected. Now scroll to the 'Sofas' group and click on 'Sofa 1' as shown below and then 'Insert'.
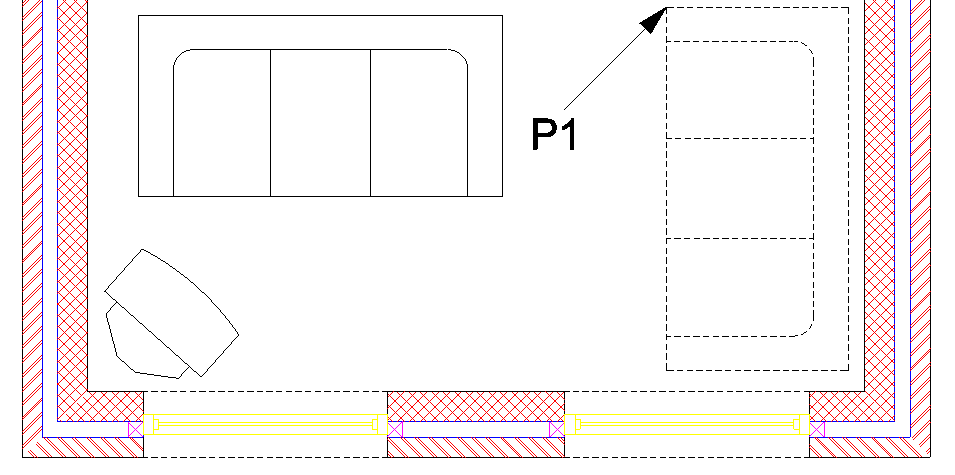
The picture below shows the required sofa position in dotted red outline and the sofa (before placement) in blue attached to the cursor. You can see the insertion point is on the front left corner of the sofa.
So to achieve the position required move the approximate point P1 and click. Now swing the cursor down and hold down the
 key, when the sofa is orientated correctly click into place.
Continue to insert the various furniture items as shown in the ground floor layout. All of the 'Lounge' and 'Dining' items used are found in the Furniture library
.
All of the 'W.C.' items used are found in the Sanitary library
. All of the 'Kitchen' and 'Utility' items used are found in the Kitchen library .
NOTE
Sometimes depending upon the insertion point it is not possible to achieve the desired position first time. You may have to place the symbol approximately and use the
 Move command to position the symbol.
The Kitchen work surfaces were added simply using the
 Line command.