Draft it Help System
The complete Help system for Draft it is available on these pages.
Available in: FREE, Plus, PRO & Architectural
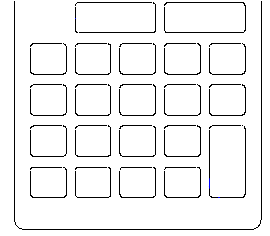
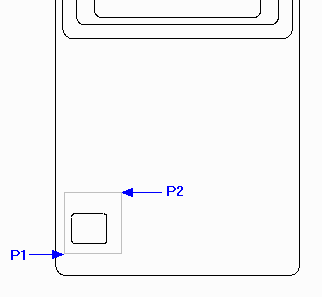
Next we will create all of the buttons. Click and then drag a Window box
(P1 to P2 below left) to select the button. Now pick the Rectangular Array
 button. Click on any of the handles to define the reference point, it does not really matter which because the array X & Y spacing will be set by distance.
On the Ribbon
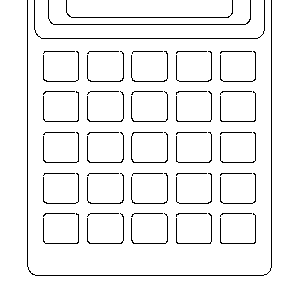
will now show the options for a rectangular array. Set both the 'No. X' and 'No. Y' to '5' .Press
button. Click on any of the handles to define the reference point, it does not really matter which because the array X & Y spacing will be set by distance.
On the Ribbon
will now show the options for a rectangular array. Set both the 'No. X' and 'No. Y' to '5' .Press
 and type '12.5' and
 then '11.5' and
.
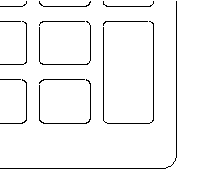
The array will now be complete a shown below right. Click anywhere to deselect the original entities.
then '11.5' and
.
The array will now be complete a shown below right. Click anywhere to deselect the original entities.
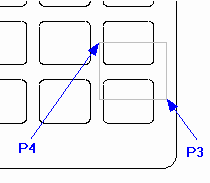
Now we will combine two buttons to make one large button. Zoom in to the area shown below left. Click and then drag a
Crossing box from P3 to P4 (below left) to select the entities to delete.
The entity handles will be displayed. Now press the 'Delete' key, the result should be as below centre. Now simply select the
Line command
 , make sure
Snap
(
, make sure
Snap
( ) is set and add two lines,
between the endpoint's P5 and P6 and then the endpoint's P7 to P8. The combined button should now appear as below right.
) is set and add two lines,
between the endpoint's P5 and P6 and then the endpoint's P7 to P8. The combined button should now appear as below right.

Now modify the top row of buttons by deleting the top left most button and combining the remaining four buttons into two as shown. Remember select the lines to delete using a right to left Crossing box.