Product Documentation
Draft it Help
Select the category below to quickly find the help you need.

Available in: Pro and Architectural only.
Select the 'Table' button  and the following table data dialog box is displayed.
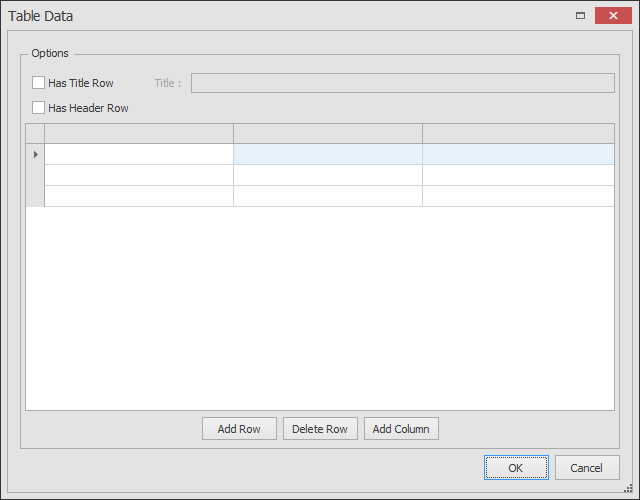
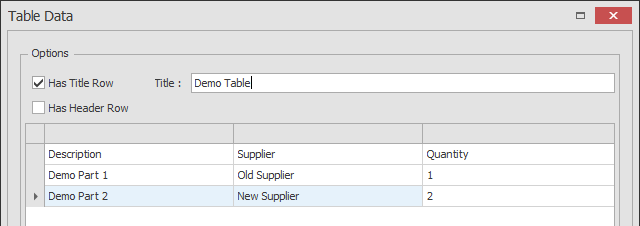
Has Title Row - Select this box to add a title row to the table, if selected the adjacent input field can be edited (see below).
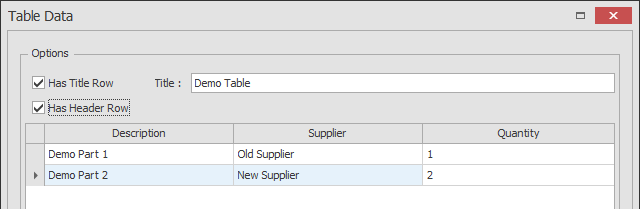
Has Header Row - Select this box to add a header row to the table, if selected a prompt asks if the data in the first row should be used in the header.
If 'Yes' is answered then the data in the 1st row is moved into the header section of the table (see below).
Use the 'Add Row' button to add a new row at the end of the table.
Use 'Delete Row' to remove a row, the row is removed whether it contains data or not.
Use 'Add Column' to add a column to the right hand side of the table.
Once all of the data has been entered click OK. If it is a new table then it can be placed on the drawing using any of the snaps and input options.
Once placed on the drawing a table can be edited.
Double clicking on any line, text or filled part of the table returns to the Table Data' dialog box.
To simply edit the data or add rows and columns this would be the suggested method.
A single click on any line, text or filled part of the table selects it. The table can easily be moved or column widths adjusted using the Entity Handles.
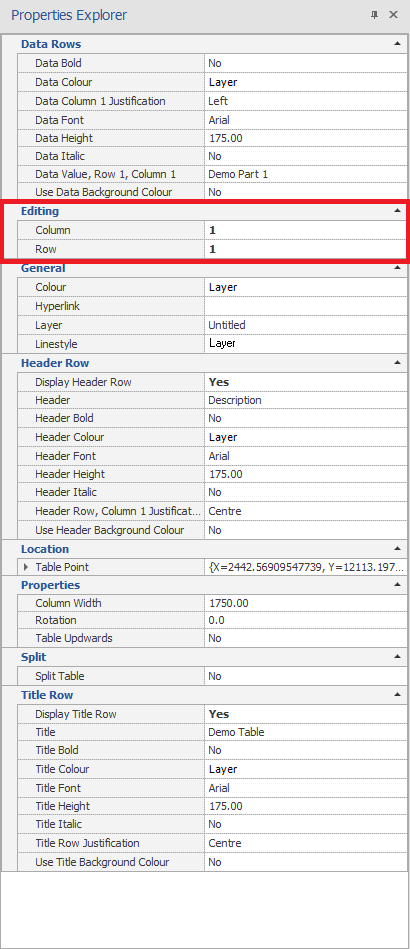
Whilst the table is selected the Properties Explorer can be used to change various table formatting options as well as the table data itself. An example is shown below.
The properties are self explanatory and it can be seen that full control of most of the table formatting is possible. It is worth noting the highlighted section below.
The numbers selected here set the particular table cell that you are editing.
So not only can you change the format of the table section that the cell is in (body, header etc.) but also the data of the cell itself.
Existing tabular data in other programs such as spreadsheets (Microsoft Excel) and document tables (Microsoft Word) can be pasted directly into Draft it as a table.
Once such an item has been copied to the clipboard then select the Paste command.
If Draft it recognises a table format then the 'Table Data' dialog box will open and the pasted data will be inserted into it.
Draft it tables may be copied to the clipboard and pasted into other Draft it drawings or other Windows applications.
Any questions?
Perhaps you need help deciding which of our CAD systems is right for you, or maybe you need to chat with us about our bespoke development service.
Don’t hesitate to get in touch. The Draft it team is dedicated to ensuring you get the best design experience on the market. Whatever you need - call us, email us – we’re here to help.
 +44 1543 419 886
 enquiries@cadlogic.com
 Postal Address Details