Product Documentation
Draft it Help
Select the category below to quickly find the help you need.

Available in: Architectural
Use this command to draw a walk in bay. Select the 'Bay' button
 and the following dialog box appears.
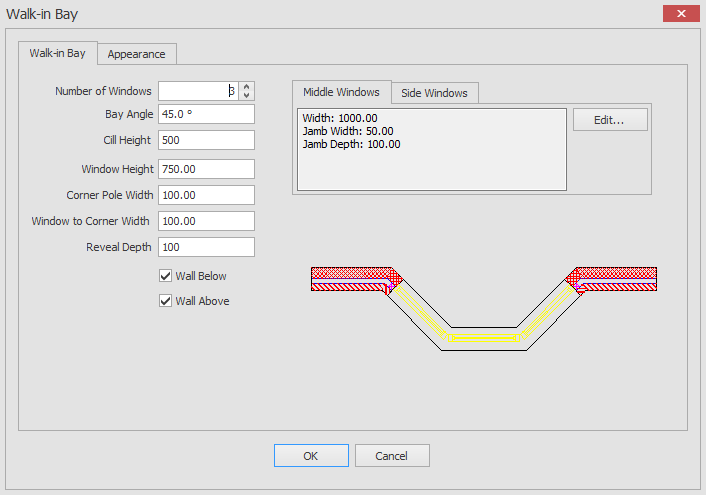
In the main bay dialog you can configure the style of the bay to create by altering the following options.
- Number of Windows - Number of windows to create
- Bay Angle - Angle of bay in degrees
- Cill Height - Height to window cill(s)
- Window Height - Height of the window(s)
- Corner Pole Width - Width of brick corner section
- Window To Corner Width - Distance from window(s) to adjoining corner
- Reveal Depth - Depth of window(s) reveal
- Wall Above - Generate wall above window(s)
- Wall Below - Generate wall below window(s)
If you click on the appearance tab the dialog will change as below.
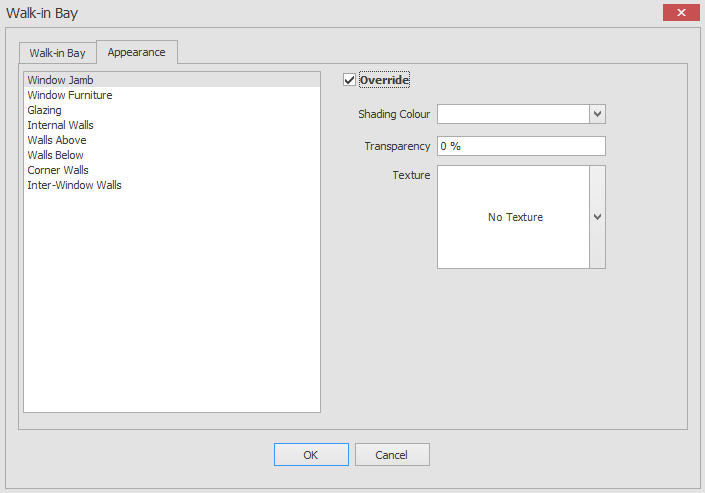
To override the appearance simply select the item in the list and then click on the override checkbox.
Once checked you will have the ability to alter the shading colour, transparency and texture for the selected item(s).
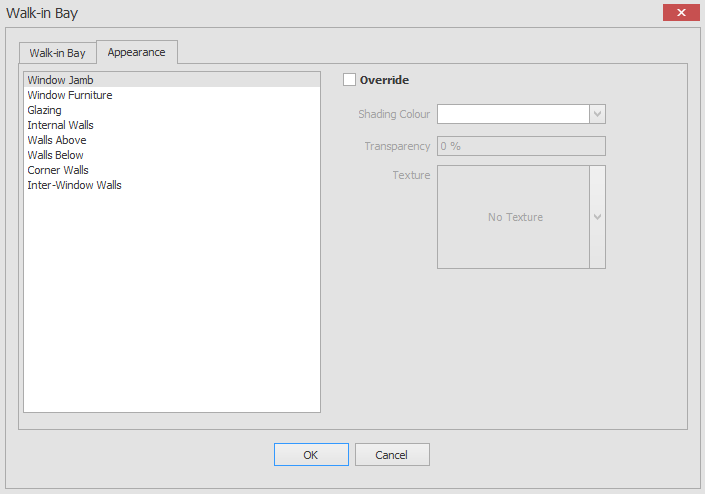
You will have the ability to override the appearance of the following items.
- Window Jamb
- Window Furniture
- Glazing
- Internal Walls
- Walls Above
- Walls Below
- Corner Walls
- Inter-Window Walls
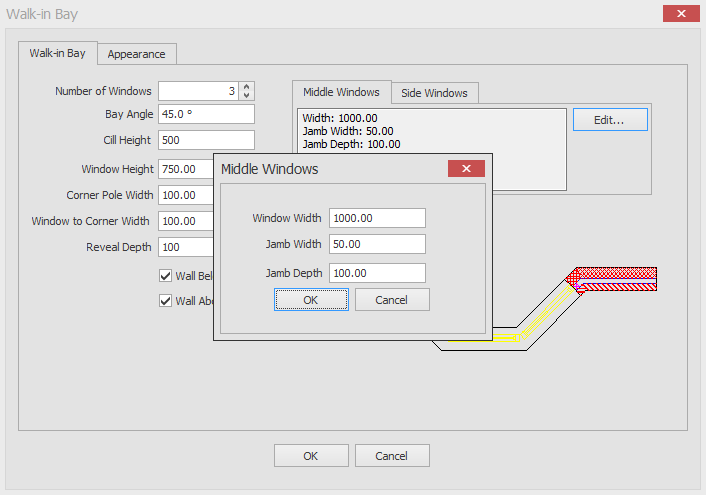
You also have the ability to adust the following properties of the middle and side windows.
- Window Width
- Jamb Width
- Jamb Depth
To adjust these settings simply select the Middle Windows or the Side Windows tab item then click on the edit button next to the displayed dimensions. You will the be shown a dialog like the one below.
Once all of the settings are correct click OK. The dialog box closes and the command prompt reads:
Create Walk-In Bay:
Select a point in any wall line with the mouse to cerate the bay window, a dynamic view of how this action will be completed will be shown so that you can see the outcome before the features are created in your drawing.
Any questions?
Perhaps you need help deciding which of our CAD systems is right for you, or maybe you need to chat with us about our bespoke development service.
Don’t hesitate to get in touch. The Draft it team is dedicated to ensuring you get the best design experience on the market. Whatever you need - call us, email us – we’re here to help.
 +44 1543 419 886
 enquiries@cadlogic.com
 Postal Address Details