Product Documentation
Draft it Help
Select the category below to quickly find the help you need.

Available in: FREE, Plus, PRO & Architectural
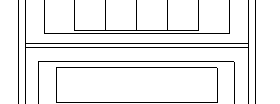
Use Zoom Window
 to close in on the area shown below. Now we will trim back both ends of the two longest horizontal lines, select the
Trim button
to close in on the area shown below. Now we will trim back both ends of the two longest horizontal lines, select the
Trim button
 .
.
Click on L1 and then L2 and press
 ,
these are the entities to trim to, and they are highlighted. Now any entity selected will be trimmed to these two lines. Now click on L3 and L4 near
to P1 and then at the other end near to P2.
,
these are the entities to trim to, and they are highlighted. Now any entity selected will be trimmed to these two lines. Now click on L3 and L4 near
to P1 and then at the other end near to P2.
Now to add numerous fillet radii. Select Zoom Extents
 .
Now pick the Fillet button
.
Now pick the Fillet button
 .
.
The relevant lines in the diagram below have been labelled. When instructed to select any of the lines it is important to select it near to the label so that the correct segment of the line is picked. You may want to use the various Zoom commands when adding the rest of the fillets to ensure the correct lines are picked and that the fillet is added to in the correct position.
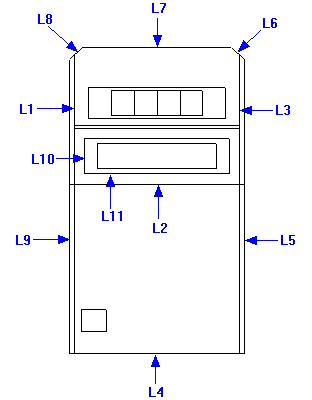
If you make a mistake when adding any of the fillets use the Undo
 function. First we will add the fillet radius between lines 'L1' and 'L2'. Click on 'L1' then on 'L2'. The 'Trim 1st Line' and 'Trim 2nd Line' option in the
Ribbon should be ON. Drag the radius dimension until the value reads '3.0' or simply type '3' and press
.
The fillet radius should now be drawn and the lines trimmed.
function. First we will add the fillet radius between lines 'L1' and 'L2'. Click on 'L1' then on 'L2'. The 'Trim 1st Line' and 'Trim 2nd Line' option in the
Ribbon should be ON. Drag the radius dimension until the value reads '3.0' or simply type '3' and press
.
The fillet radius should now be drawn and the lines trimmed.
Repeat the command using 'L2' and 'L3', the Distance Input should be locked at '3.0' so just click to accept. The same fillet value will be used on the next six corners so repeat the command and add a fillet to 'L4' & 'L5', 'L5' & 'L6', 'L6' & 'L7', 'L7' & 'L8', 'L8' & 'L9' and then 'L9' & 'L4'. Now add another fillet to 'L10' & 'L11' with a 2mm radius
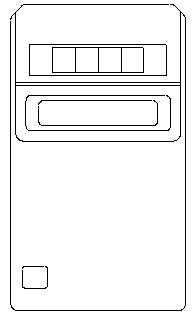
. Repeat this for the other three corners of that rectangle and then for all four corners of the rectangle inside it. Now add a 1mm fillet to each corner of the small 'button' rectangle. The calculator drawing should now appear as shown below.
Any questions?
Perhaps you need help deciding which of our CAD systems is right for you, or maybe you need to chat with us about our bespoke development service.
Don’t hesitate to get in touch. The Draft it team is dedicated to ensuring you get the best design experience on the market. Whatever you need - call us, email us – we’re here to help.
 +44 1543 419 886
 enquiries@cadlogic.com
 Postal Address Details