Product Documentation
Draft it Help
Select the category below to quickly find the help you need.

Available in: Architectural
The Architectural Symbols Group is part of the Architectural Ribbon Page. There is only one command available in the 'Architectural Symbols Group'.

Use the 'Architectural Symbols' command to insert a 3D symbol from the system library into the current drawing. The majority of these symbol are parametric so you have the ability to change some or all of the keys sizes.
When selected the following dialog box is displayed.
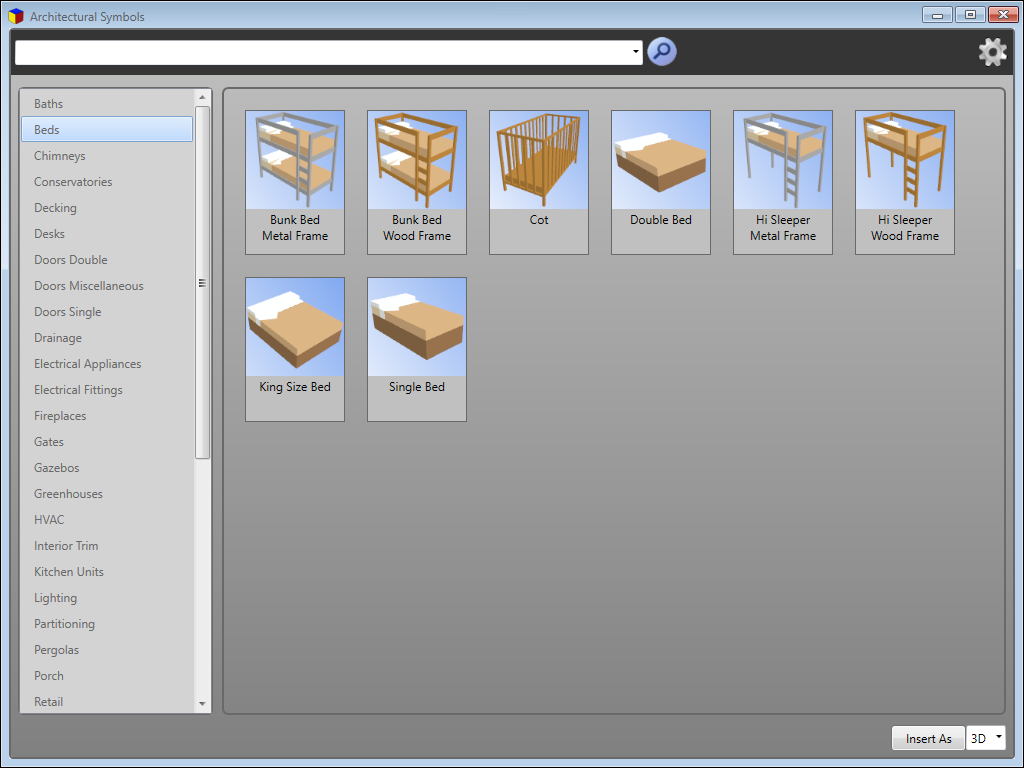
The dialog box can be resized to suit your requirements. The left hand portion displays the symbol categories available, simply click on the required category heading to preview the available symbols in the right hand window.
Click on any of the available symbols and the lower portion of the window changes to display a further preview window and a list of the sizes that can be modified.
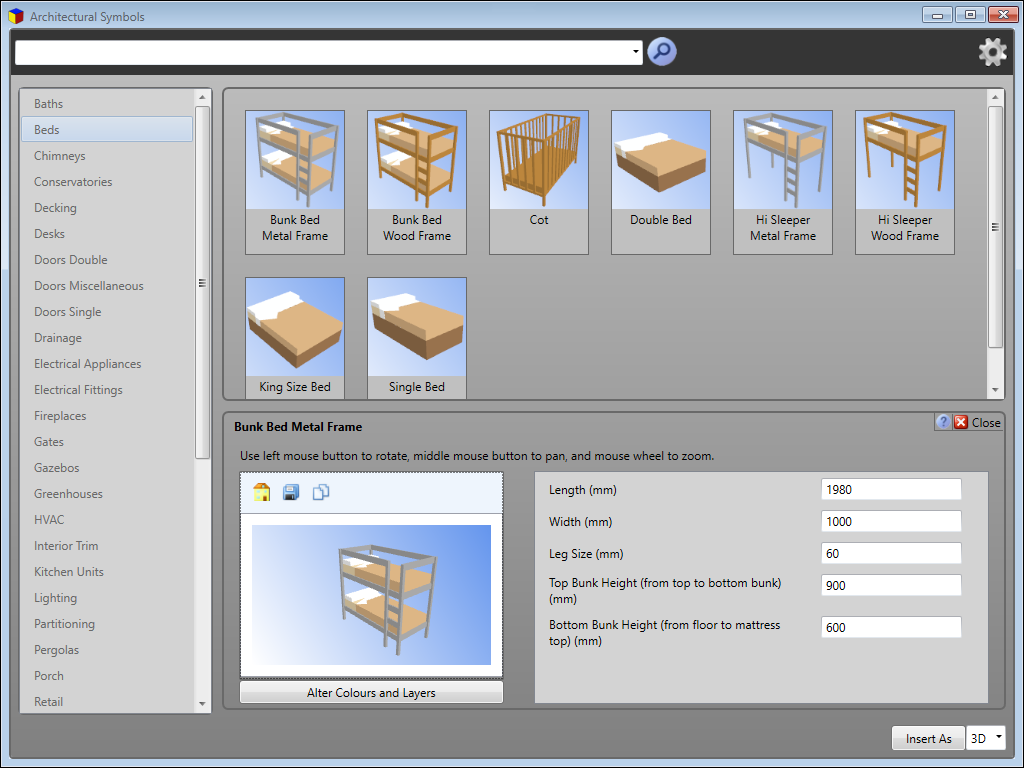
Below shows the lower area of the box after the re-sizing the whole dialog box. You will see that the preview window of the selected symbol is now larger. Click and hold the left mouse button down in this preview window to spin the view of the symbol, roll the mouse wheel forward and backward to zoom in and out. This feature allows you to examine the symbol in more detail. You can edit any if the sizes and the preview will instantly update after entering the value.
There are 3 buttons above the preview, the first  allows the preview image to be reset back to the original view, the 2nd
  saves the current view as an image file (.jpg), the 3rd button
  copies the current view to the clipboard so it can then be pasted elsewhere.
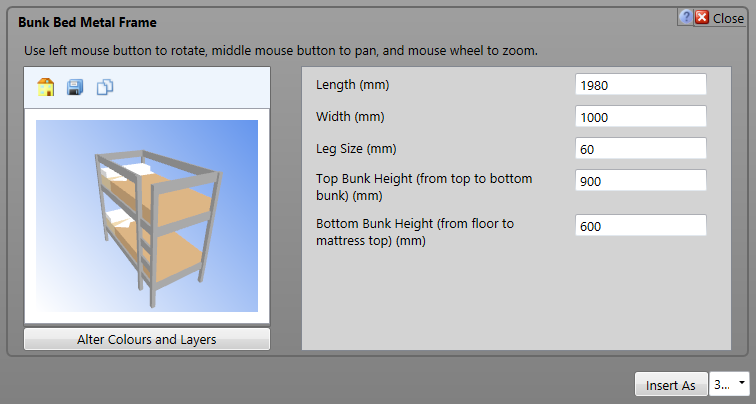
Underneath the preview window is the 'Alter Colours and Layers' button. When selected a further dialog box is displayed.
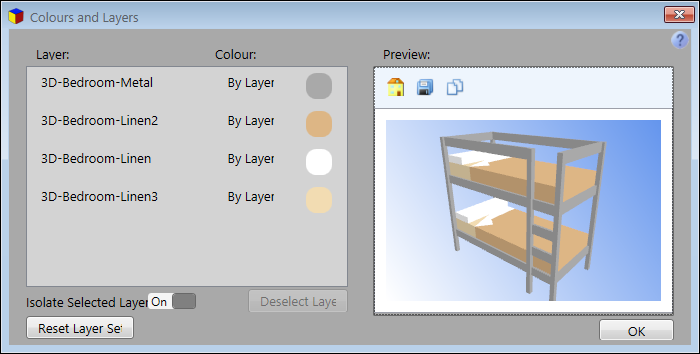
The entities within the symbol are pre-assigned to a number of layers. In this example 4 separate layers have been used. So for example if we wanted to use a different colour for the '3D-Bedroom-Linen2' simply click on the layer name itself. The image below shows the result if this is done.
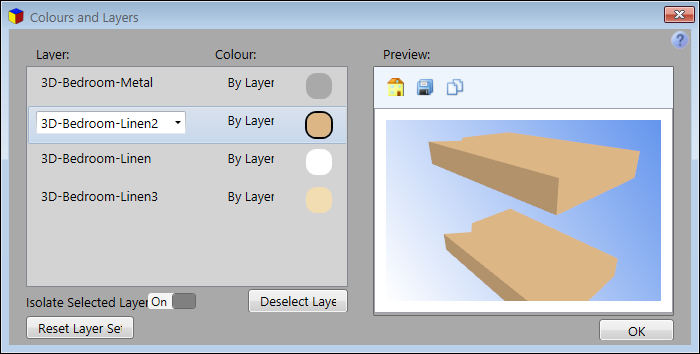
The toggle switch immediately below the preview window controls what happens in the preview when a layer is selected.
It turns on/off the display of just the selected layer or all of the layers.
Set this to your preference as and when required.
Because this is set to 'on' only the entities on the selected layer are shown in the preview.
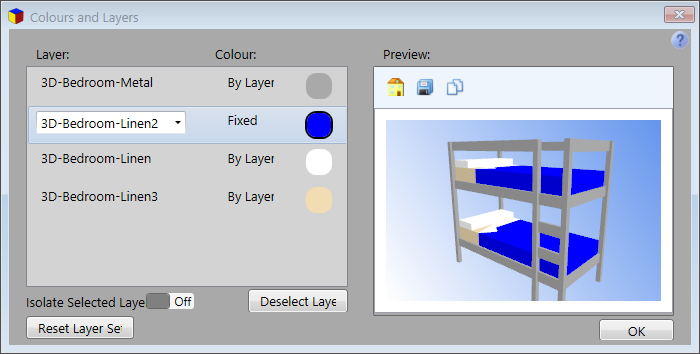
The actually layer for the entities itself maybe changed by clicking on the down arrow next to the name and selecting a different layer from those already existing in the current drawing.
The current colour of that layer will be used and the layer swatch and preview will update.
To change to colour of the selected layer click on the swatch next to it, pick a colour from the 'standard' colours or 'more colour' mixer.
Once done the layer swatch and preview will update, the example below you will see the second layer colour has been changed.
Any questions?
Perhaps you need help deciding which of our CAD systems is right for you, or maybe you need to chat with us about our bespoke development service.
Don’t hesitate to get in touch. The Draft it team is dedicated to ensuring you get the best design experience on the market. Whatever you need - call us, email us – we’re here to help.
 +44 1543 419 886
 enquiries@cadlogic.com
 Postal Address Details