Product Documentation
Draft it Help
Select the category below to quickly find the help you need.

Available in: FREE, Plus, Pro and Architectural
Click on this button
 create a rectangular array. This command is not available until a selection set
is present. i.e. you must pre-select the item(s) to array before selecting the array command.
create a rectangular array. This command is not available until a selection set
is present. i.e. you must pre-select the item(s) to array before selecting the array command.
Once you have selected the item(s) to array select the button and the prompt reads:
Give Reference Point:
Now select a reference point using any of the snaps and input options. This is the point by which the array offset distances are measured, any point/position can be used here but it makes sense to use one that has some relevance to the selected item(s).
The prompt now reads:
Give point to Array to:
The system toolbar changes to display the snaps and input options.
Similar to the following (depending upon the last use).

The Ribbon changes to display options for the array, 'No.X',
'No.Y', 'Rotation' and 'Fit Copies' as follows.
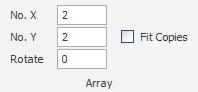
Each time the Draft it program is started the values for these fields to the defaults, subsequently they retain the values last used. These values are 'No.X' (number of copies in the X axis, 'columns'), 'No.Y' (number of copies in the Y axis, 'Rows') and 'Rotation' (rotation of the array). This rotation is applied to the array i.e. it is the angle that the X & Y axis is tilted through, however this angle is not applied to the selection set entities, each copy of the entities remains in the original orientation. We will look at the effect of the final option 'Fit Copies' later in the topic.
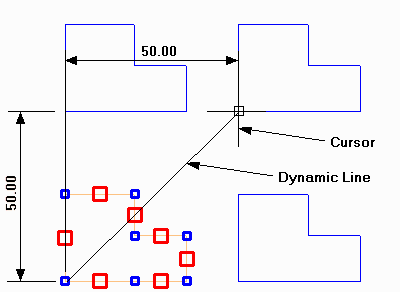
The spacing of the array copies is controlled by the distance from the 'Reference Point' to the cursor. A dynamic line is drawn between these positions and
as the mouse is moved multiple copies ('No.X' & 'No.Y') of the selection set
will also move dynamically. The position of this 'point to array to' can be specified using any of the
snaps and input options<.
Most commonly as it is a rectangular array the
 X, Y input option would be used to specify the distances between the rows and columns.
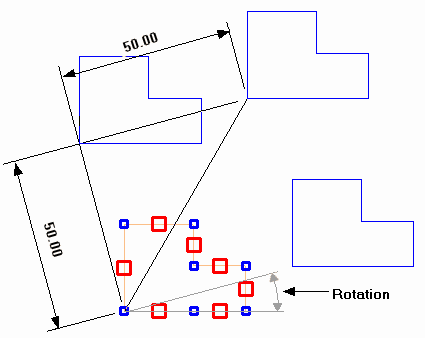
In both examples below 'No.X' & 'No.Y' are set to 2 therefore the array will comprise 2 columns and 2 rows, the spacing in both X & Y is set to 50. However the left hand array the rotation angle is 0 whilst the example to the right the rotation is 15º. As you can see the X & Y axis of the array is tilted through this angle but the entities remain in their original orientation.
Let's look at the affect of the 'Fit Copies' option. This option changes how the spacing values are interpreted. If in the example above the No.X & No.Y where both set to 5 then you can see that the 5 copies in both axis would be spaced with a gap of 50 between each one. This is because the spacing defined is used as an incremental spacing. When 'Fit Copies' is selected the spacing becomes the total absolute span of the array.
Here is another example to demonstrate.
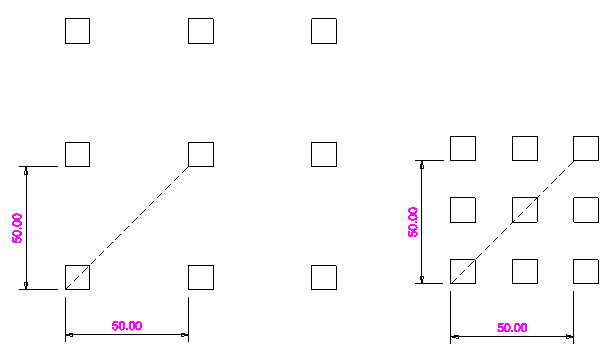
This example is a 10mm square with 3 copies in X and 3 in Y.
On the left the spacing in 50 in X and in Y, as represented by the dotted line. On the right all of the values are identical but 'Fit Copies' is selected, so the copies are equally spaced between the distances or 2 points.
Any questions?
Perhaps you need help deciding which of our CAD systems is right for you, or maybe you need to chat with us about our bespoke development service.
Don’t hesitate to get in touch. The Draft it team is dedicated to ensuring you get the best design experience on the market. Whatever you need - call us, email us – we’re here to help.
 +44 1543 419 886
 enquiries@cadlogic.com
 Postal Address Details