Product Documentation
Draft it Help
Select the category below to quickly find the help you need.

Available in: Pro and Architectural
Use this command to insert a image onto your drawing. The supported formats are BMP, JPG, WMF and PDF.
Select the Insert Image button  From the file dialog box that opens select the raster image file and click 'Open'. Use the 'File Type' drop down to change the file extension if required.
For BMP, JPG & WMF the command operates as follows.
A second dialog is now displayed previewing the selected image.
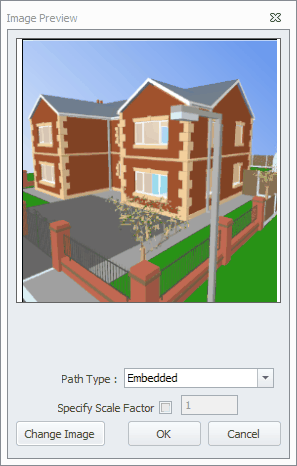
If required you can click 'Change Image' to select an alternative image from the file dialog box. Click 'Cancel to cancel the command.
The image size (in pixels), resolution and colour depth are displayed for information only.
Path Type can be set as either Absolute, Relative and Embedded. 'Absolute' stores a link to the location of the image file as a full path i.e. relative to the root folder on the current drive. Use this option is the location of the drawing and image will not change.
'Relative' stores a link to the location of the image as a relative path to the drawing location. Use this option if it is likely that the drawing will be moved. The image should be located in the same folder as the drawing or in a sub-folder of the drawing folder. This is so that if the drawing and image/image folder are moved to a new location the relative path to the image will still be correct.
'Embedded' stores the image inside the drawing file, this ensures the image always appears but increases the drawing file size. Use this option if the drawing will be moved or sent to another user.
The 'Specify Scale Factor' tick box allows a scale factor to be entered into the input box to the right. If ticked a scale factor of '1' will insert the picture at it's defined size i.e. 100%, if you enter '0.5' it will be half size and so on.
Click 'OK' to accept the image and scale factor, the dialog box disappears and the bottom left corner of a rectangle is attached to the cursor displaying the size of the scaled image. Click into place using any of the snaps and input options.
If the 'Specify Scale Factor' box is not ticked when 'OK' is clicked the dialog box disappears and the prompt reads:
Give First Corner Point:
Here you must indicate on the drawing using any of the snaps and input options the first of two points defining a box that will contain the picture.
Give Second Corner Point:
Now indicate the second point again using any of the snaps and input options. As you move the cursor a dynamic box is displayed indicating the size of the image. You will notice that the proportional X and Y sizes of the box are maintained so that the image is not distorted, this can be modified later, see Modifying/Moving an Image.
If the image selected is a PDF file type then the insertion options are slightly different. Because a PDF can contain multiple pages you can use the forward and back arrows to select the page required. The preview window does not allow the 'path type' option to be set as a PDF file has to be embedded in the Draft it drawing file. In addition to this it is not possible to preset the insertion scale, this is because Draft it cannot ascertain the size of the PDF document so there is no reference size to scale, however you can use the 2 corner points to control the size.
Gray scale
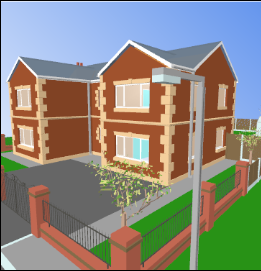
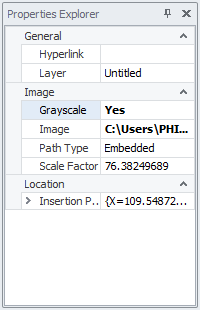
If an inserted image has the 'Path Type' set to 'Embedded' then an additional post-insertion option is available. This option is 'Gray scale' and can be found in the Properties Explorer when an image is selected. Below is an embedded imaged and the properties explorer to the right with the 'greyscale' set to 'No'.

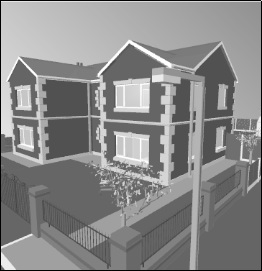
When the 'greyscale' is set to 'Yes' the colour is removed.
Any questions?
Perhaps you need help deciding which of our CAD systems is right for you, or maybe you need to chat with us about our bespoke development service.
Don’t hesitate to get in touch. The Draft it team is dedicated to ensuring you get the best design experience on the market. Whatever you need - call us, email us – we’re here to help.
 +44 1543 419 886
 enquiries@cadlogic.com
 Postal Address Details